Cleaning a menstrual cup or disc involves rinsing, washing with gentle soap, and sterilizing regularly to maintain hygiene, prevent bacteria, and extend its life. Follow these simple steps for every stage - before first use, during your cycle, and between cycles - for a safe, odor-free, and sustainable experience.
Table of Contents
- Why Cleaning Your Menstrual Cup Matters
- What You’ll Need: Essential Cleaning Tools and Supplies
- Cleaning a Brand-New Menstrual Cup Before First Use
- How to Clean Your Menstrual Cup During Your Period
- Deep Cleaning: Keeping Your Menstrual Cup Fresh Between Cycles
- How to Remove Stains and Odor From Your Menstrual Cup
- Signs Your Menstrual Cup Needs Extra Cleaning Care
- Cleaning Do's and Don'ts: Common Mistakes to Avoid
- How to Sterilize Your Menstrual Cup Safely at Home
- Storage Tips: Keeping Your Menstrual Cup Fresh and Ready for Next Use
- Eco-Friendly Cleaning Solutions for Your Menstrual Cup
- When to Replace Your Menstrual Disc or Cup: Maintenance and Longevity
- Conclusion: Prioritizing Hygiene and Sustainability
Why Cleaning Your Menstrual Cup Matters
Maintaining proper cleanliness of a menstrual cup or disc is crucial to ensure both personal hygiene and overall health. Since menstrual cups are reusable, they come into direct contact with sensitive areas of the body, making effective cleaning essential for preventing potential infections or irritation.
A clean cup also helps preserve its material, extending its lifespan and functionality. Residual buildup from menstrual fluid or improper cleaning may lead to odors, or even bacterial growth over time. Regular cleaning promotes safety while ensuring comfort and confidence during each use. Understanding these reasons highlights the vital importance of proper menstrual cup care.
It’s important to note that if you do experience discoloration of your cup over time, this is normal and not an indication of bad hygiene practices.
What You’ll Need: Essential Cleaning Tools and Supplies
To ensure proper cleaning and maintenance of a menstrual disc or cup, having the right tools and supplies is crucial. Here’s a list of all the essentials:
Basic Supplies
Mild, fragrance-free, pH-Balanced soap: Use a soap that's free of harsh chemicals to avoid irritation or damage to the cup’s material. There are also menstrual disc and cup-specific cleansers designed for safe and effective cleaning. Using a soap that is pH-Balance also helps to avoid any irritation.
Clean water: Both warm and cold water are essential for rinsing and cleaning thoroughly. We recommend washing your cup with cold water first, which can help avoid staining.
Specialized Tools
Soft-bristled brush: Useful for scrubbing hard-to-reach crevices without scratching.
Cup sterilizer or boiling pot: Ideal for deep cleaning and disinfecting. Ensure it's solely designated for menstrual cup use.
Optional Items
Menstrual disc/cup cleansing wipes: Convenient for traveling or on-the-go cleaning.
Pin or toothpick: Helpful for clearing out small suction holes on traditional menstrual cups.
Cleaning a Brand-New Menstrual Cup Before First Use
A new menstrual cup or disc must be thoroughly cleaned to ensure it's free from manufacturing residues and safe for use. Follow these steps to prepare the cup:
Wash your hands: Use soap and water to clean your hands before touching the cup.
Rinse with water: Rinse the new cup under cool water to remove surface dust or residue.
Boil the cup: Submerge the menstrual cup in boiling water for 5-10 minutes. Ensure it doesn't touch the pot's bottom to prevent warping. Pro tip: put your menstrual cup inside a whisk to prevent it touching the sides of the pan. Set a timer so that you don’t forget!
Dry thoroughly: Remove the cup with clean tongs, then let it air dry on a clean surface.
Always store in a breathable pouch afterward.
How to Clean Your Menstrual Cup During Your Period
To maintain hygiene during your period, it's essential to clean your menstrual cup or disc regularly. Follow these steps to ensure proper care:
Empty the Cup Frequently: Remove the cup every 4-12 hours, depending on your flow, to prevent leaks and maintain cleanliness.
Rinse with Cold Water First: Start with cold water to prevent stains from setting, then follow up with warm water. Use a Gentle,
Unscented Soap: Opt for a mild, fragrance-free and pH-Balanced soap to avoid irritation and preserve the silicone material. Alternatively, you can use a menstrual cup wash, specifically designed for this purpose, to ensure safe and effective cleaning.
Thoroughly Rinse the Cup: Ensure all soap residue is removed.
Dry Before Reinsertion: Shake off excess water or pat the cup dry with a lint-free cloth before reinserting.
Consistency in cleaning ensures optimal functionality and comfort.
Deep Cleaning: Keeping Your Menstrual Cup Fresh Between Cycles
Deep cleaning your menstrual cup ensures optimal hygiene and helps extend its lifespan. Between cycles, a more thorough cleaning process is recommended to remove odors and lingering bacteria. Start by boiling the cup for 5-10 minutes in a pot of water. Use a dedicated pot to prevent cross-contamination. Avoid letting the cup touch the bottom of the pot to prevent damage—placing it in a whisk or strainer can help.
Inspect for residue in the air holes and rim. Use a soft-bristled brush, toothpick, or a sterilized pin to clear any debris. Choose fragrance-free soap or cup-specific cleaner to avoid irritation. Store the fully dried cup in a breathable pouch to maintain freshness.
How to Remove Stains and Odor From Your Menstrual Cup
To effectively remove stains and odors from a menstrual cup or disc, focus on gentle but thorough cleaning techniques. Over time, discoloration and lingering smells may develop, but they can usually be addressed with routine maintenance.
Soak in Hydrogen Peroxide: Soak the cup in a solution of 1 part 3% hydrogen peroxide and 1 part water for 6-8 hours to lighten stains. Rinse thoroughly afterward. Note that the use of hydrogen peroxide can degrade the silicone menstrual cup.
Use Baking Soda Paste: Gently scrub stubborn stains with a paste of baking soda and water, then rinse to remove residue.
Boil the Cup: Boiling the cup for 5-7 minutes can neutralize odors. Ensure it doesn't touch the bottom of the pot.
Avoid Harsh Chemicals: Steer clear of bleach or scented soaps as they may damage the silicone or irritate sensitive skin.
Repeat as needed for freshness. Check out our in-depth beginners guide to dealing with menstrual cup staining.
Signs Your Menstrual Cup Needs Extra Cleaning Care
Persistent Odor: If the cup emits a strong or unusual smell even after cleaning, it may require a deep-cleaning routine to eliminate lingering bacteria or residue.
Sticky or Slimy Texture: A sticky or tacky film on the surface often signals that soap residue or buildup has accumulated and needs to be thoroughly removed.
Prolonged Use: Menstrual cups over a year old or exposed to frequent use may need extra sanitization to ensure long-term hygiene and safety.
Irritation Post-Use: Unexpected discomfort or irritation could be a sign the cup is harboring bacteria or not fully clean, requiring immediate action.
Cleaning Do's and Don'ts: Common Mistakes to Avoid
Proper care of a menstrual cup requires attention to specific practices and the avoidance of common pitfalls.
Do's
Use mild, fragrance-free soap: Ensure the soap does not contain harsh chemicals or oils that could leave residue on the cup.
Sterilize regularly: Boil the cup in water for 5-10 minutes between cycles to eliminate bacteria effectively.
Rinse thoroughly: Always rinse your cup with clean water after washing to avoid soap buildup, which can irritate sensitive areas.
Inspect for damage: Regularly check for tears, cracks, or discoloration that may compromise safety or cleanliness.
Don'ts
Avoid using harsh cleaners: Bleach, vinegar, or hydrogen peroxide can degrade the silicone over time.
Don't use abrasive brushes: Scrubbing intensely can damage the surface, making it less smooth and hygienic.
Never skip drying: Storing the cup wet promotes bacteria growth; air dry it completely before storing.
Don't reuse unclean water: Dirty water can lead to infections or contamination. Always use clean, filtered water.
How to Sterilize Your Menstrual Cup Safely at Home
Proper sterilization is essential to maintain menstrual cup hygiene and prevent infections. Start by washing your hands thoroughly to create a clean environment. Use a dedicated pot to avoid cross-contamination, filling it with enough water to submerge the cup completely.
Place the cup in boiling water for 5-7 minutes, ensuring it doesn't touch the bottom by using a whisk or slotted spoon to suspend it. Monitor the process to avoid overheating or deforming the silicone. After boiling, allow the cup to cool and dry entirely before storing it in a breathable pouch.
Alternatively, menstrual cup sterilizers are available for a convenient and efficient sterilization process. After boiling, allow the cup to cool and dry entirely before storing it in a breathable pouch.
Storage Tips: Keeping Your Menstrual Cup Fresh and Ready for Next Use
Proper storage ensures a menstrual cup stays hygienic and lasts longer. To begin with, always store the cup in a breathable bag, such as a cotton pouch, instead of an airtight container. This prevents trapped moisture, which can lead to mold or bacteria growth. Ensure the cup is completely dry before storing to avoid odor issues.
Choose a cool, dry space, away from direct sunlight, as UV exposure can degrade the material over time. Regularly wash the storage pouch to maintain cleanliness. Avoid storing the cup near heavily scented items to minimize the risk of material absorption.
Eco-Friendly Cleaning Solutions for Your Menstrual Cup
Switching to eco-friendly cleaning solutions not only protects the menstrual cup but also minimizes harm to the environment. Plant-based or biodegradable soaps are excellent alternatives to regular soaps as they avoid harsh chemicals. Avoid cleansers containing fragrances, sulfates, or oils that may degrade the silicone material.
For a DIY approach, consider using a diluted vinegar solution or baking soda mixed with water to gently eliminate buildup. Always rinse thoroughly with filtered or boiled water to prevent residue. Incorporating eco-conscious practices ensures the menstrual cup remains safe for personal use while aligning with zero-waste lifestyles.
When to Replace Your Menstrual Disc or Cup: Maintenance and Longevity
A well-maintained menstrual disc cup can last for years; however, its longevity depends on proper care, frequency of use, and the material. Medical-grade silicone cups typically last 1-10 years, while latex or rubber cups may need replacing sooner.
Signs it's time to replace your cup include:
Tears or cracks: Wear and tear can affect functionality.
Persistent discoloration: Staining that doesn’t go away after cleaning may indicate aging.
Foul odors: Odors that linger even after sanitization could signal material breakdown.
Loss of flexibility: Changes in texture or firmness reduce performance.
Routine inspections ensure safety and effectiveness, extending your cup's life while maintaining hygiene. However, if you notice any of the signs listed above, take it as a clear indication that it's time for menstrual cup replacement.
Conclusion: Prioritizing Hygiene and Sustainability
Proper care of a menstrual cup or disc not only safeguards personal hygiene but also extends its lifespan, supporting sustainability efforts. Cleaning routines should prioritize gentle yet effective methods to eliminate bacteria and odors without compromising the material of the cup.
Users are encouraged to sterilize the cup regularly, ideally before and after each cycle, using boiling or sterilizing solutions recommended by manufacturers. For on-the-go maintenance, unscented wipes or clean water serve as practical interim options.
Choosing eco-friendly cleaning solutions aligns with environmentally conscious values, ensuring the menstrual cup remains a safe, reusable, and sustainable alternative to disposable menstrual products.
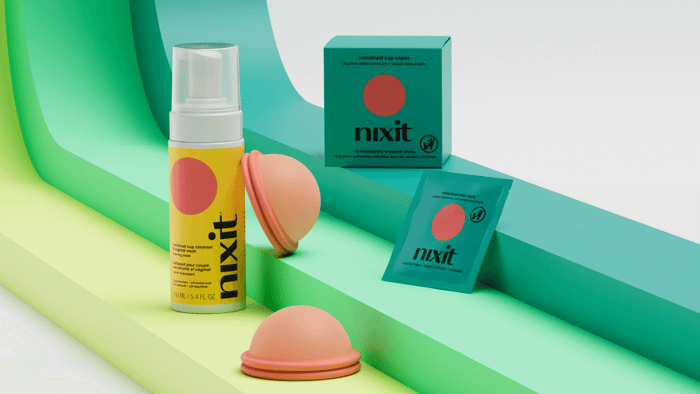
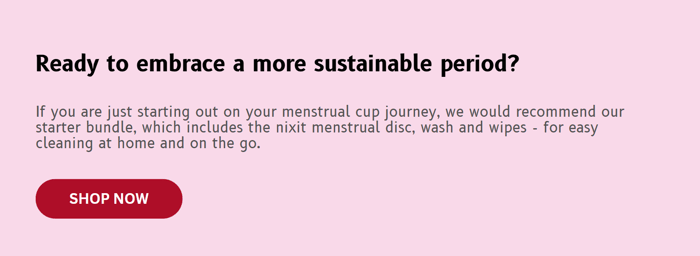
nixit menstrual cup cleanser & vaginal wash
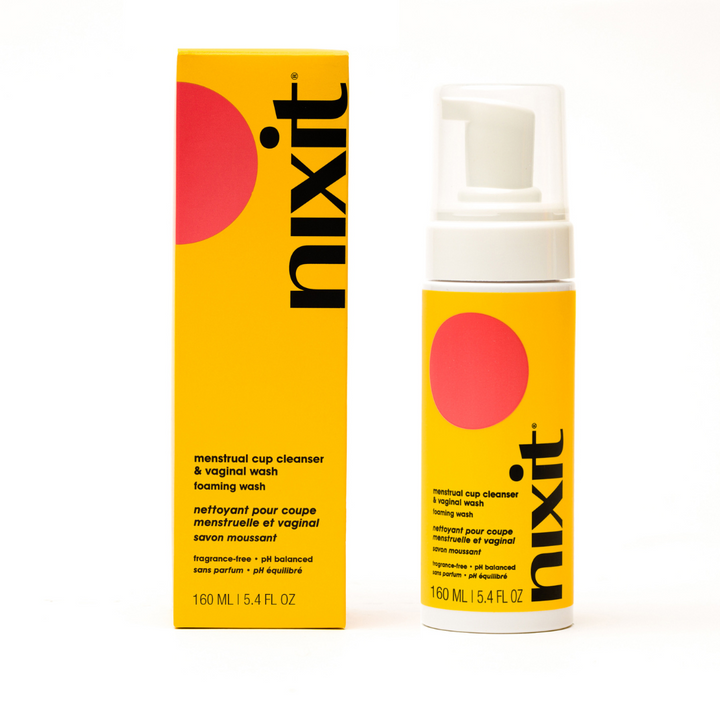
$15.00
This gentle, unscented vaginal wash is specially formulated for both your vulva and menstrual cup or disc, unlike strong soaps or synthetic fragrances that can irritate. Perfect for cleaning most period discs and menstrual cups without leaving residue, this cleanser… read more